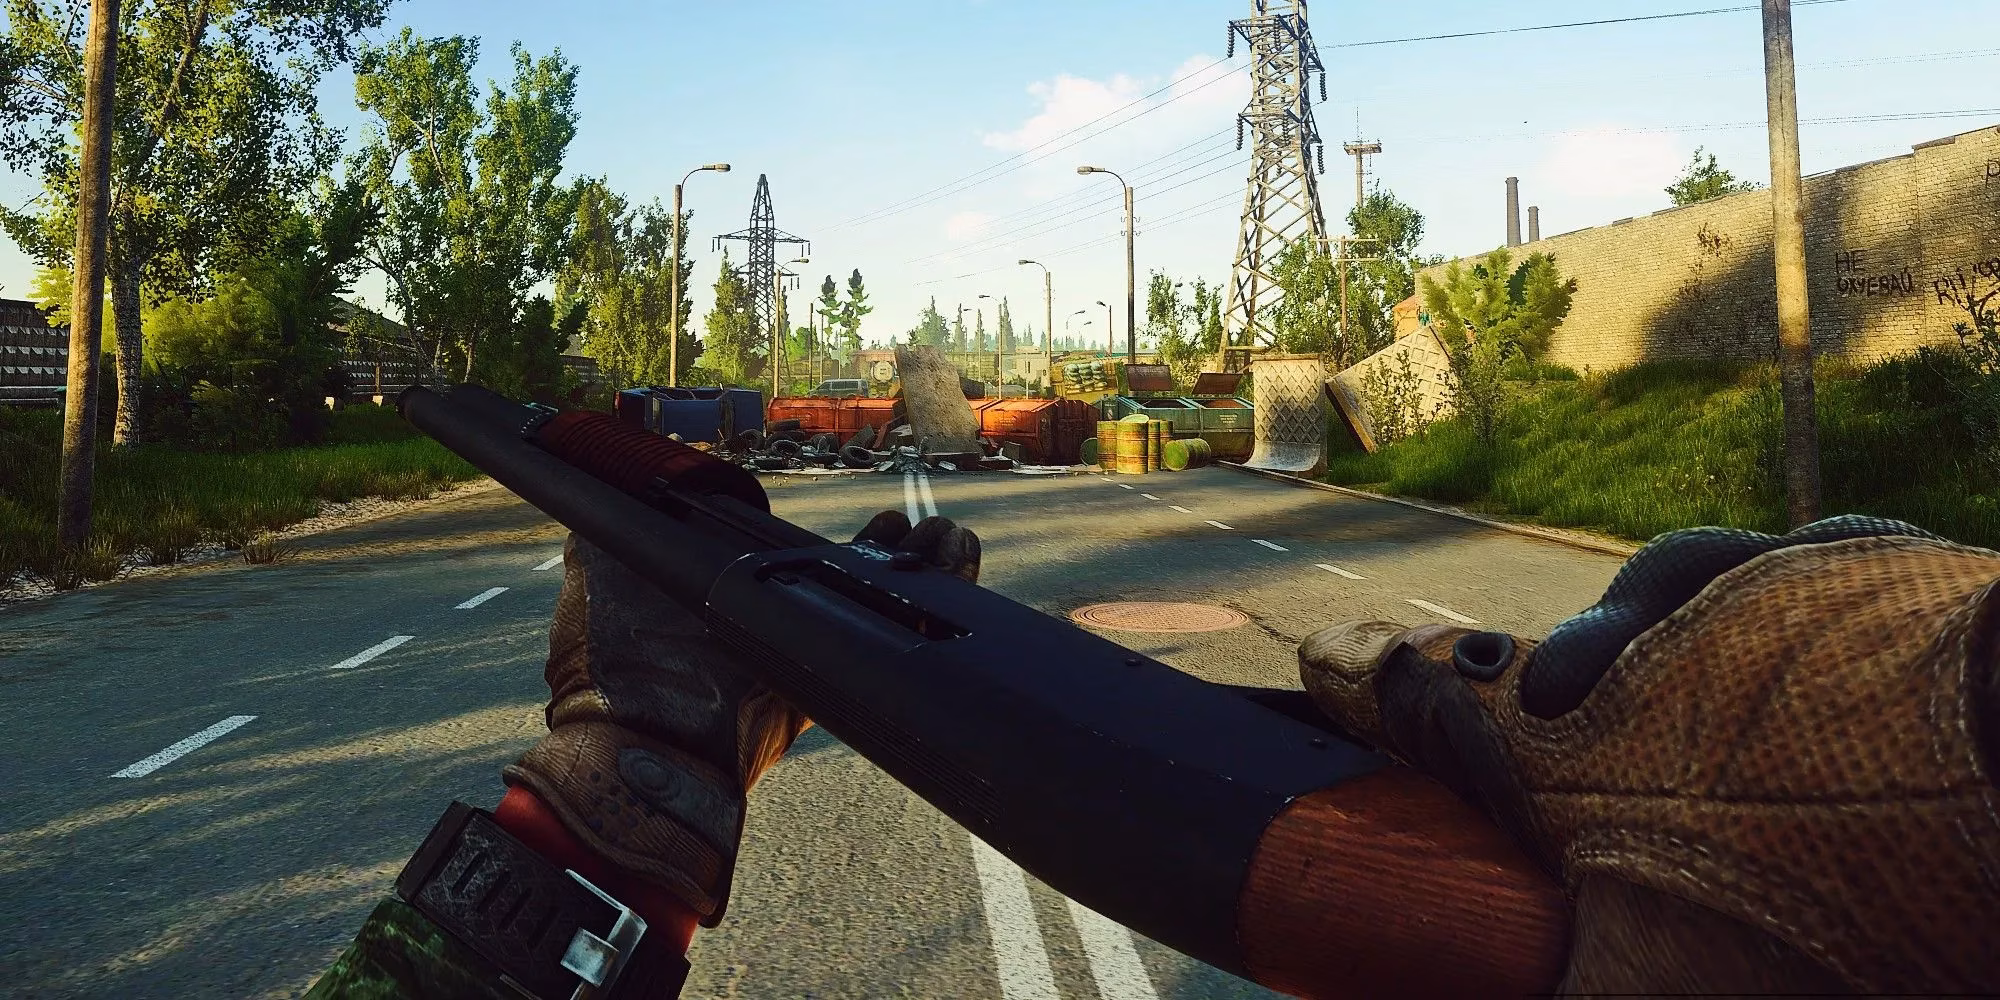
As an experienced Tarkov operator, I vividly recall how Gunsmith Part 1 transformed my understanding of weapon mechanics. This foundational Mechanic quest remains one of Escape From Tarkov's most valuable tutorials in 2025, offering crucial early-game rewards that significantly boost progression. Unlike superficial customization systems in mainstream shooters, Tarkov demands genuine gunsmith knowledge – understanding recoil patterns, ergonomic tradeoffs, and modular compatibility. When I first accessed the workbench in my hideout, the overwhelming array of components felt like deciphering an engineering schematic. But conquering this quest fundamentally changed my survival rate by teaching me how to transform basic firearms into purpose-built instruments of warfare.
🔧 Weapon Customization Fundamentals
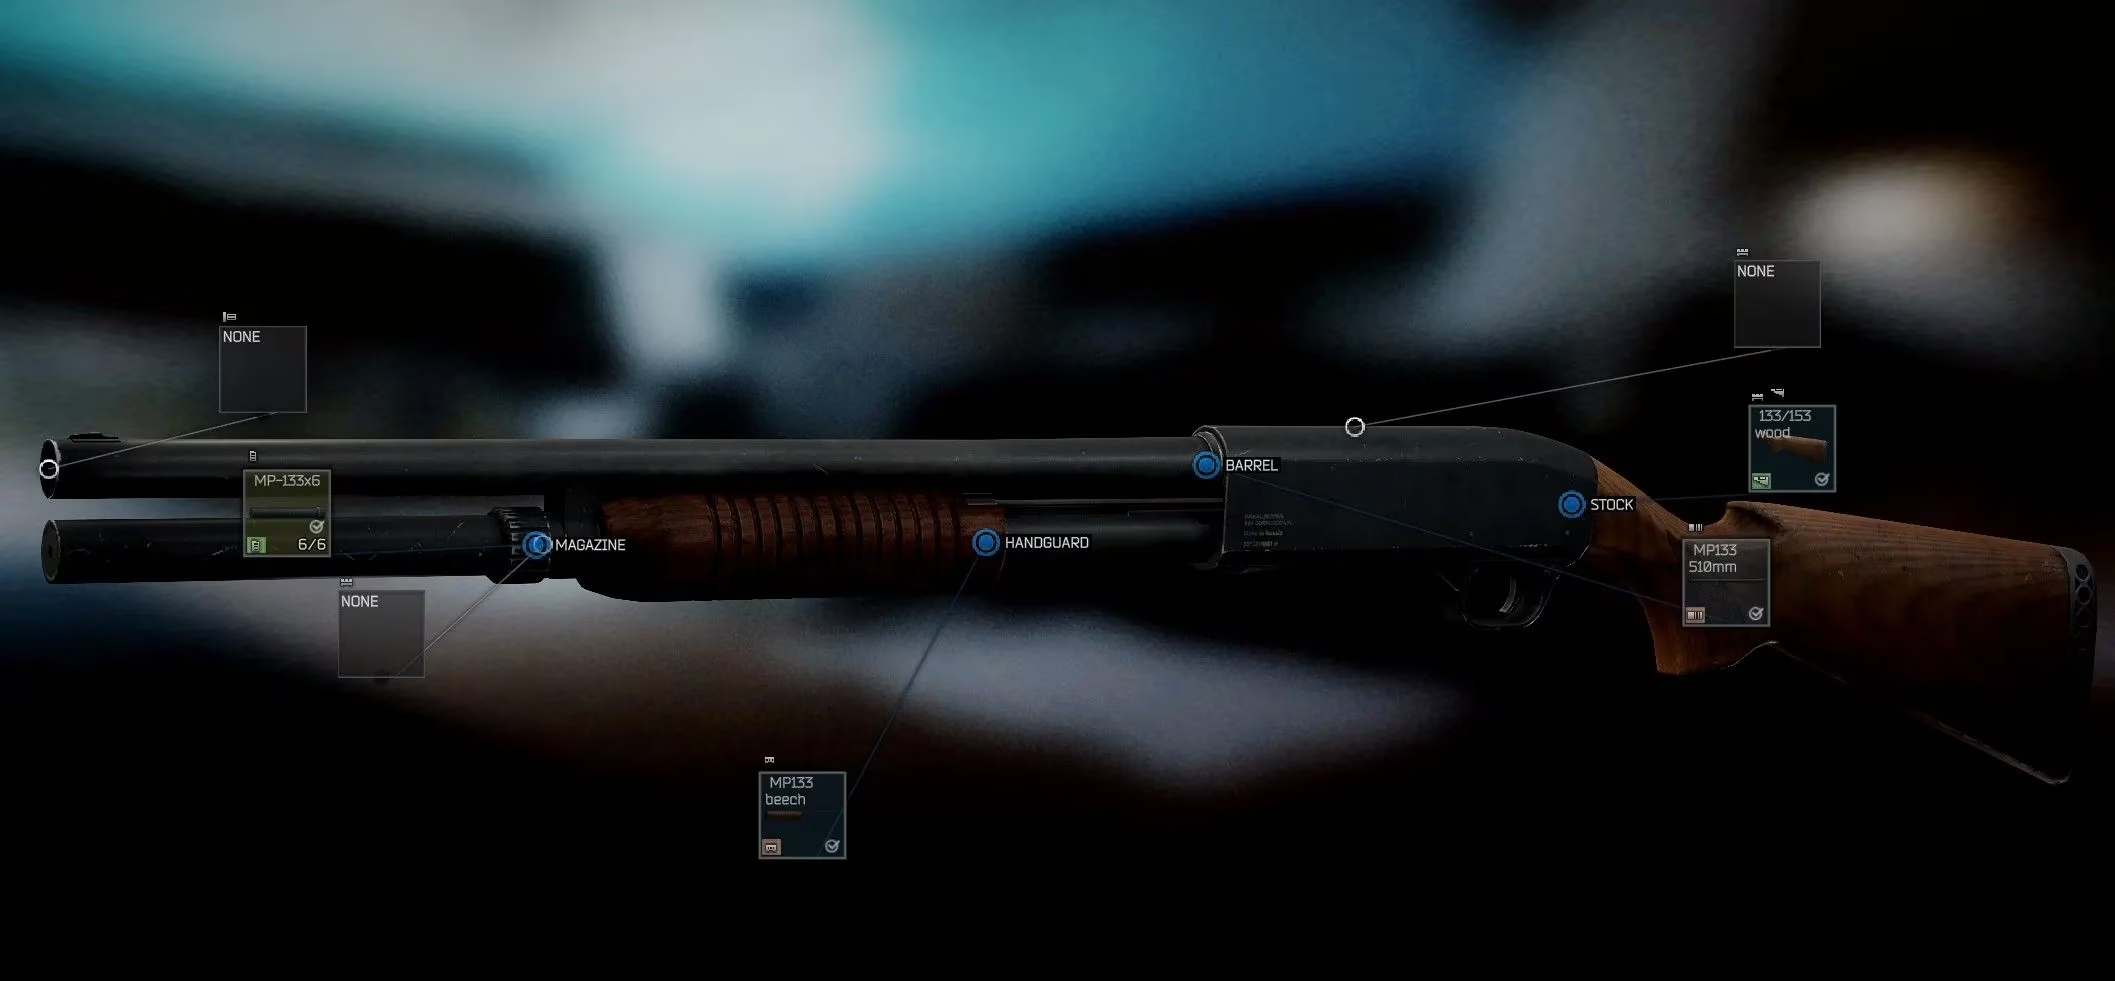
Tarkov's unparalleled attention to ballistic realism means modding isn't just slapping attachments onto rails. When I right-click any weapon and select Edit Preset, I'm presented with a detailed breakdown of every customizable component – from trigger assemblies to gas blocks. The puzzle icon ⚙️ becomes your best friend for assembling compatible parts after selection. Unlike arcade shooters, here you'll learn practical gunsmithing: how barrel length affects velocity, why certain optics won't mount without adapters, and how foregrips influence sway control. This granular approach initially intimidated me, but now I appreciate how it mirrors real-world weapon tinkering.
📜 Decoding Gunsmith Quest Mechanics
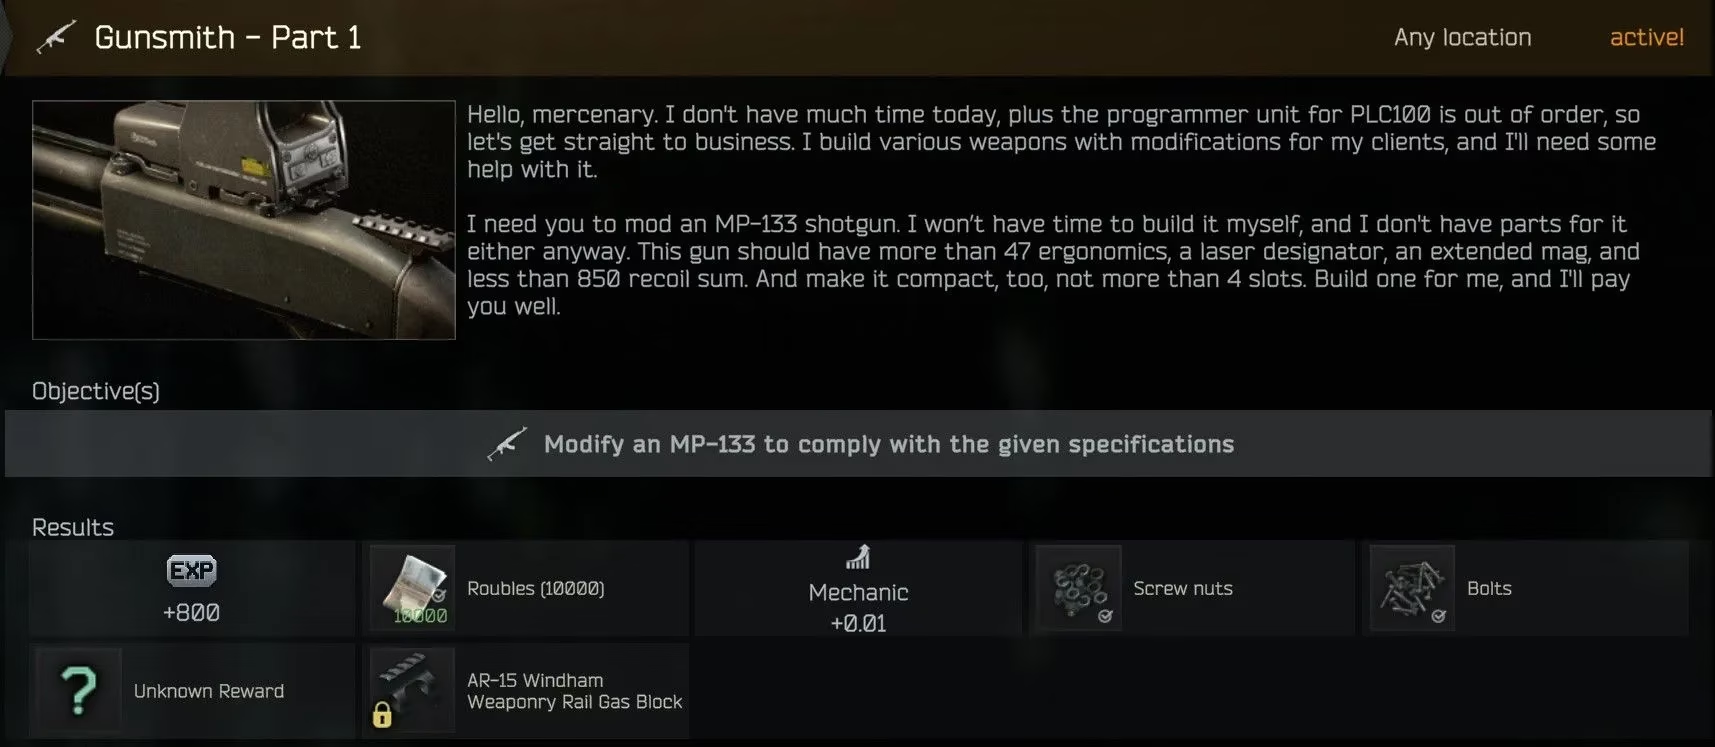
Upon reaching Level 2, Mechanic initiates this quest chain that serves as Tarkov's vocational school for PMCs. Each task requires configuring specific firearms to exacting specifications – the MP-133 being your inaugural assignment. Key parameters include:
-
Recoil control (≤850 total)
-
Ergonomics target (47+)
-
Capacity expansions
-
Attachment slot limitations (max 4)
I always double-check weapon stats via the Info panel before submission. Early mistakes cost me precious roubles when my configurations failed validation despite looking visually correct!
🔫 MP-133 Shotgun Build Specifications
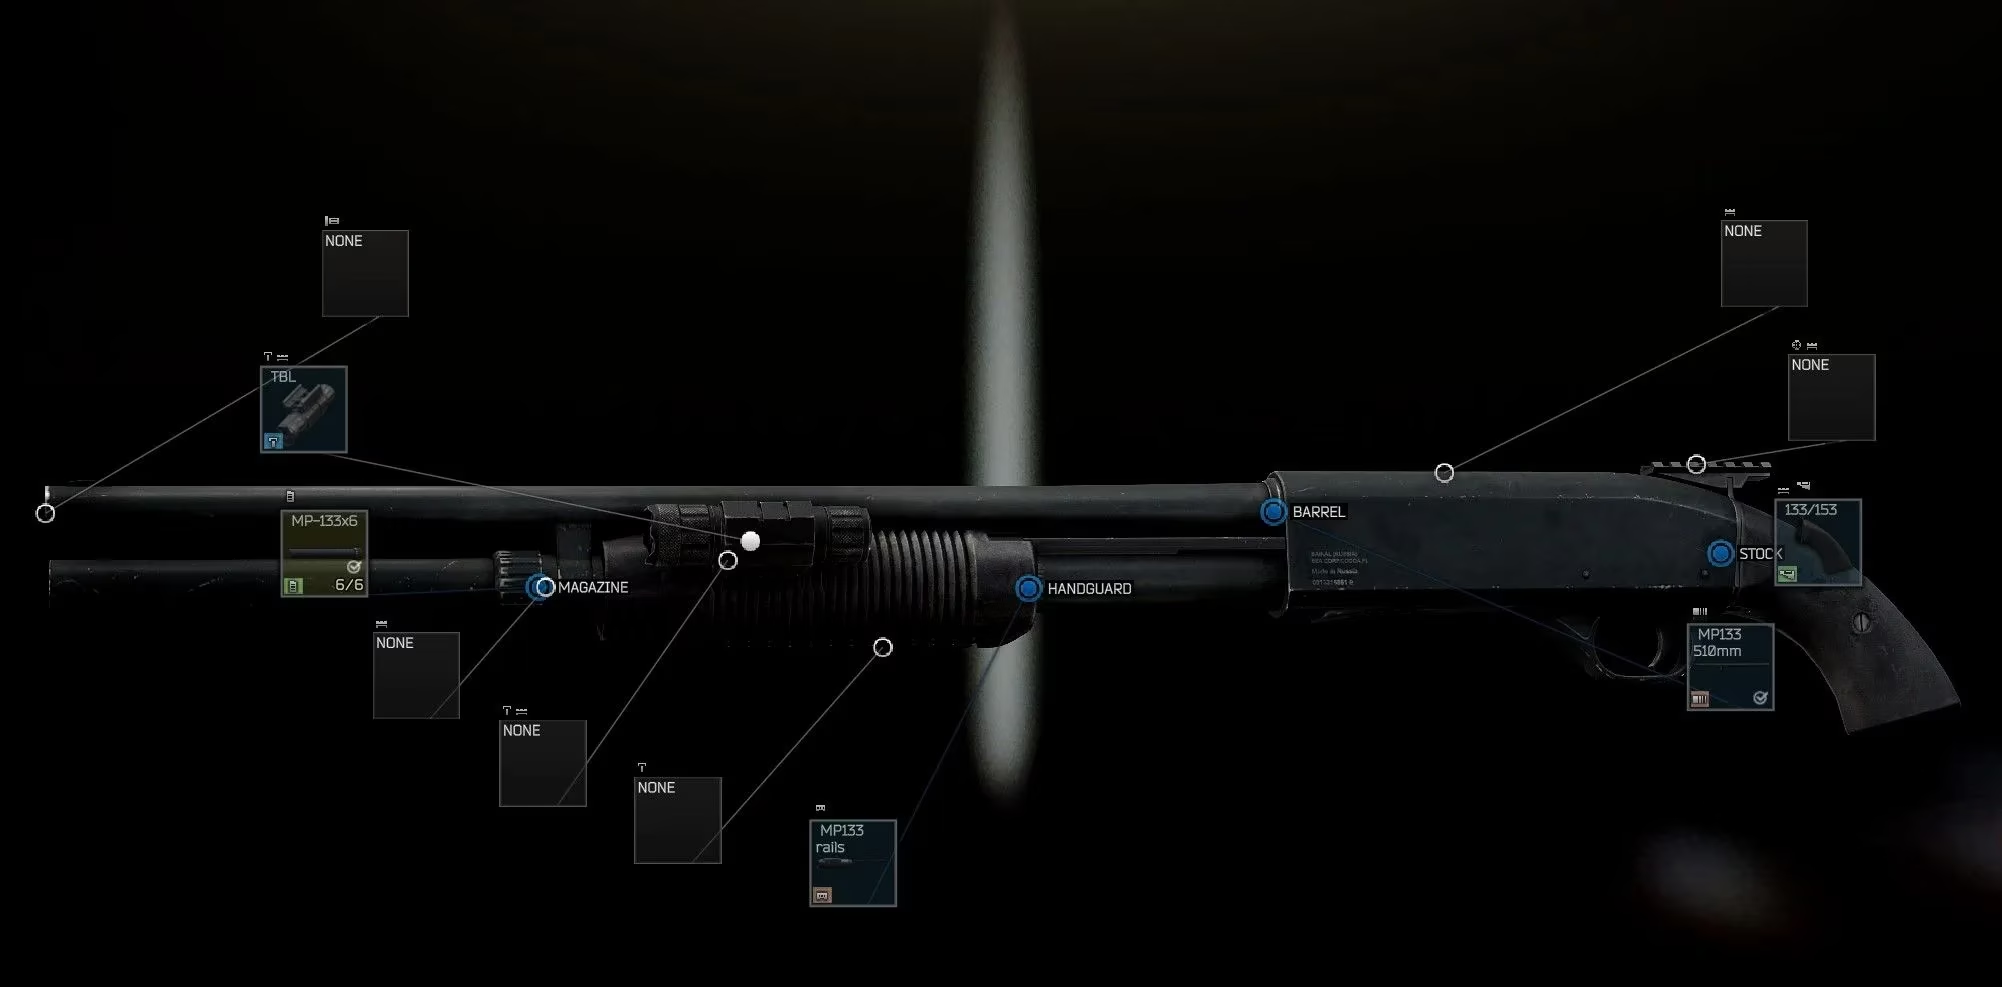
The MP-133 remains the perfect training weapon for Gunsmith Part 1 due to its straightforward modification path. I typically source mine from Jaeger – though scav runs occasionally yield usable specimens. Here's the proven configuration that consistently passes Mechanic's inspection:
| Attachment Component | Trader Source | Cost (₽) |
|---|---|---|
| Plastic Forestock with Rails | Mechanic L1 / Jaeger L2 | 9608 |
| Plastic Pistol Grip | Jaeger L1 | 6836 |
| NcSTAR Blue Laser Module | Skier L1 | 5658 |
This setup achieves the critical 47+ ergonomics while keeping recoil under 850. The blue laser satisfies designator requirements without consuming excessive slots. Remember: the pistol grip drastically improves handling, while the railed forestock enables essential attachments.
❓ People Also Ask
How early should I attempt Gunsmith Part 1?
Immediately upon unlocking Jaeger and Skier. The XP and unlocks dramatically accelerate hideout development.
Can I use found attachments instead of buying?
Absolutely! Scavenge MP-133s from weapon crates – but verify stats match requirements.
Why does recoil matter so much for shotguns?
Controlled follow-up shots are lifesavers in CQB where this shotgun excels.
What rewards make this quest worthwhile?
Beyond ₽15k and XP, you unlock vital Mechanic rep and the AK-74N blueprint.
Are there common build mistakes?
Overlooking slot limits or forgetting to activate the laser module post-installation.
This quest epitomizes Tarkov's brutal-yet-rewarding learning curve. By mastering these mechanics early, I transformed from a scavenging novice into someone who could confidently modify any firearm mid-raid. The MP-133 build remains a rite of passage – one that teaches enduring principles about weight distribution, sight alignment, and recoil management. What foundational quest do you believe best prepares new operators for Tarkov's unforgiving combat?